I was going to screen print these images onto the petri dishes, or perhaps onto adhesive vinyl to stick onto them, but with the CMYK process this would take all week at least, and printing on other surfaces is so hit-and-miss… not to mention the images are far too detailed for halftone.
I’d also been wondering what to do with my boxes, because as I mentioned the idea of a ‘readymade’ is not something I’m comfortable with - it’s too far separated from my own practice, I am too set in my ideas regarding image authenticity, and too interested in translation through printmaking, etc. The other plan was to hand paint or screen print the box designs onto another surface, but once again, that’s a time consuming commitment.
Photographing the boxes results in a lot of lens distortion and an image that was not quite as high-definition as I would like. Instead I scanned every box and photoshopped them together (as discussed in this post.) To save myself a lot of time in the printmaking room, I thought I’d try to get two birds with one stone.
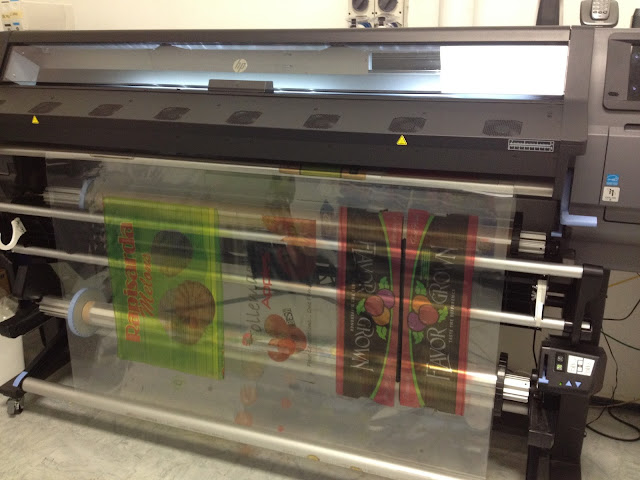
So I went out to my uncle’s company called V3, and used their sign-printing shop to print these images onto clear adhesive. (Luckily, because I used to work at V3 for a summer job, and my uncle owes me for a lot of babysitting, they let me do the printing for free. I imagine it would have been a few hundred dollars otherwise!) They also taught me how to use their new printing machine and the computer programs specific to it. The printer has a vacuum table inside it which needs to be adjusted according to the weight of the vinyl, and the ink is automatically heat-set after it prints. A very cool process to learn about and play around with. I'm so glad I got to have a hand in the technical side of things with this printing process - MUCH more valuable and interesting than just sending them off to a printer and seeing only the finished product!
We printed on a couple of different surfaces: optic clear adhesive, which is crystal clear and the adhesive is super strong, almost permanent; and a normal clear adhesive which is cloudier but cheaper and removable.
The super transparent, super high quality vinyl was perfect for the fruit images
But we ran out of this type of vinyl while printing the boxes, which led to using the lower quality one for a few of them.
In studio - during my cross-group crit somebody said these look like a spread of alternative flag designs, haha! I quite like the prevalence of NZ symbols, like the silver fern in the pepper.


